Degritter Ultrasonic Record Cleaning Machine


The Degritter ultrasonic record cleaning machine is made in Estonia and pretty much  wholly automated. Stuart Smith takes this £2275 machine for a spin…cycle.

So, I’ve been looking forward to trying the Degritter for quite a while now as, let’s face it, even the most sophisticated manual record cleaning machines can be time-consuming, and whilst the excellent Kirmuss is absolutely fantastic at renovating and rejuvenating old, and frankly filthy, records, its process is laborious to the point where you really only want to use it to clean your very oldest and filthiest vinyl. Likewise, the Clearaudio vacuum machine we own; it’s great and does a good job but it’s pretty big and very noisy in use, and like the Kirmuss you have to be stood over it and engaged through the whole process, the Clearaudio is less “labour-intensive” and much faster. My main aim with my record collection is, let’s face facts here, to spend time listening to the tunes and not spending time maintaining it and ensuring its cleanliness, and so after a clean, it gets a cursory brush before and after each play and that’s pretty much it. I’ve also been a long time advocate of the stylus actually doing a pretty good job of getting down into the grooves to clean out the crud. But I digress!
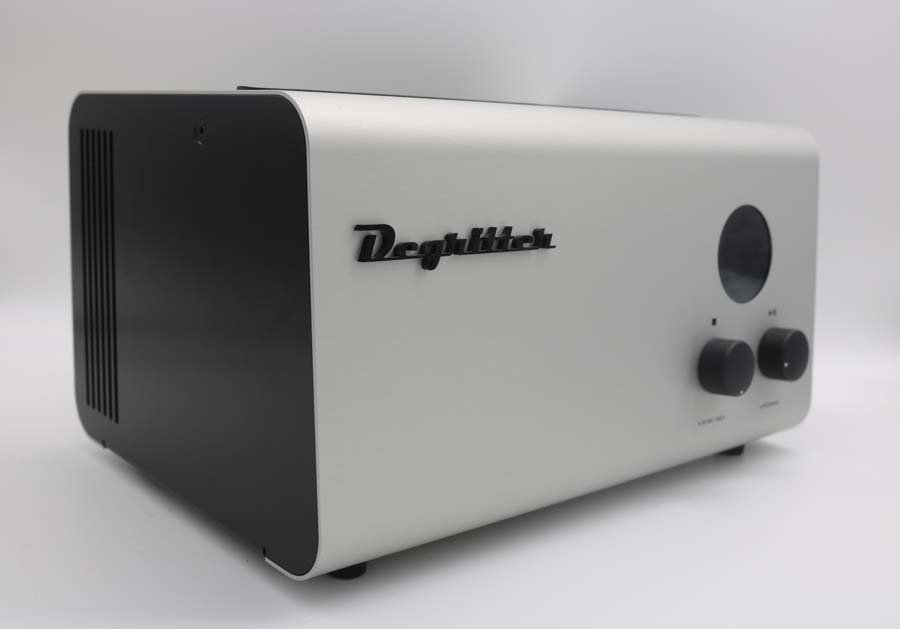
The Degritter from Estonia is a domestic printer sized ultrasonic, automatic record cleaner. It’s lovely looking and a well-finished bit of kit measuring 37 x 28 x 21 cm and will fit nicely on a rack or sideboard – really, it’s very much like a printer in format. It weighs 8.7Kg.
BACKGROUND
The Degritter, as mentioned, is an ultra-sonic record cleaning machine and operates at 120 kHz, which the parent company says will ensure that records are cleaned thoroughly but without and damage to the record itself – that’s reassuring then!
Put in simple terms, ultra-sonic cleaning creates loads of microscopic bubbles inside the cleaning bath by a process called “cavitation”. Each of the bubbles themselves is essentially a tiny little vacuum created by the high-frequency pressure waves moving through the cleaning solution. Each of the bubbles is created and then it collapses in on itself (pops) which releases heat and teeny-tiny water jets which are essentially the things that get into the grooves and do the cleaning. Pretty simple really.
Degritter has chosen a frequency of 120 kHz as it is claimed to give a “finer and more evenly distributed cleaning action than lower frequency systems”.
FEATURES
Inside the Degritter is the ultrasonic bath that uses a 300W ultrasonic amplifier that has been specifically designed for the purpose of cleaning your vinyl. This amp powers the ultrasonic transducers (one each side of the bath so that both sides of the record are cleaned at the same time. Think of it as an amp powering speakers but at very high frequencies and in a liquid. A unique feature of the Degritter is the Frequency Sweep feature that they claim provides better cavitation energy and power distribution.
The machine has an active filter mechanism meaning that small particles and debris from your records (the crud) is removed from the cleaning solution during the process which in turn means that the crud that is washed off your records is removed from the bath and so can’t deposit itself back on your precious vinyl. In the package you get 5 little foam filter doodads – the water in the bath is circulated through the filter and then back into the bath. Cleverly the water is sucked into the filter from the top of the cleaning tank so that floating particles are also removed. Bigger and heavier particles sink to the bottom of the tank and are pumped out to the external and removable (a great feature) water tank.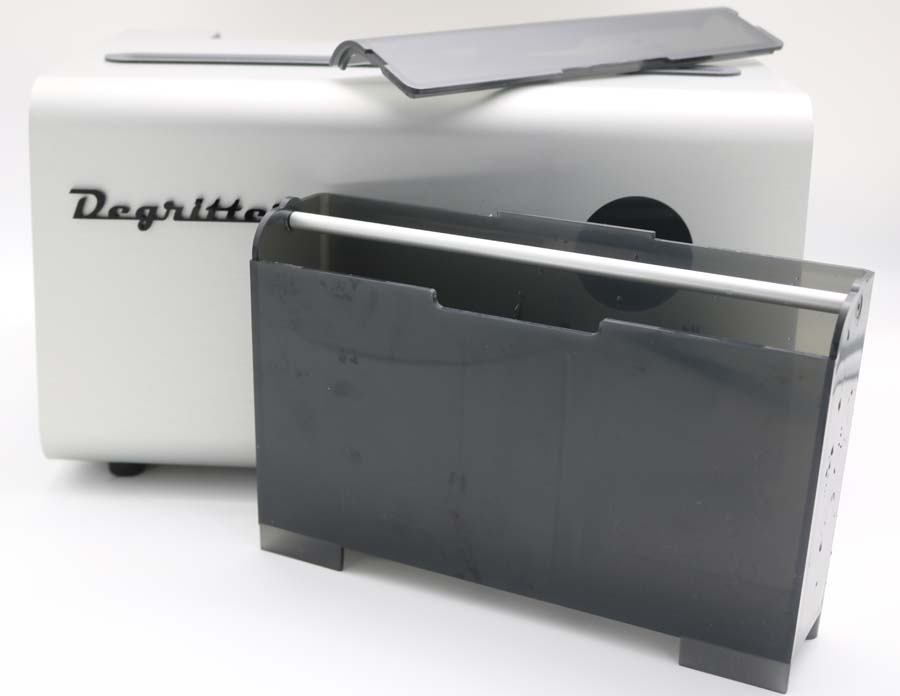
What is pretty cool about the Degritter is that as well as automatically cleaning your records, (no need to stand over it while it does its thing) it also dries them too, and has configurable drying fans which are the loudest part of the whole process. There are 20 fan settings so that the user can decide for themselves what speed/power/noise they are most comfortable with, though obviously the noisiest setting is going to dry your records the quickest.
Before using the Degritter I had to do a firmware update which was, even for this luddite, dead simple. Format a Micro SD card (FAT 32), go to the Degritter site, put in the serial number of your machine, download the update, copy it to the SD card, pop it in the machine (making sure that the Degritter is set for the correct voltage as you can easily switch between 220V and 110V depending on which country you are using your machine in), turn on the machine and wait a few seconds until the update is complete and the (very cool) display tells you to remove the card. Piece of cake and the machine is ready to start working its way through your collection. Just a quickie on the variable voltage; this I think is a really cool feature as we now live in a world where people are mobile and living in different countries. With the Degritter you can go anywhere in the world to live and know it will work there.
Safety-wise the Degritter is pretty switched on and well thought out and there are multiple sensors that monitor the state of the machine constantly. In effect the sensors allow the Degritter to detect and recover from bad stuff happening; for example, if the power is lost during the cleaning process or the temperature in the bath gets a bit above optimum and safe for vinyl it will automatically sense and sort this. The sensors are also monitored by the software which is reassuring and gives you a double back up to give you peace of mind. So, sensor-wise we can forget about them malfunctioning, the water getting too hot, forgetting to clip in properly the external water tank, not having enough water in the tank and pump failure. All that may seem a bit over the top, but it is this kind of sophistication that sets the Degritter apart and, of course, adds to the cost of the product.
In the box, as well as the machine itself, you get 5 filters, 2 bottles of fluid (rinse aid and record cleaning fluid) a pipette, instructions, and a water level “measurement strip”.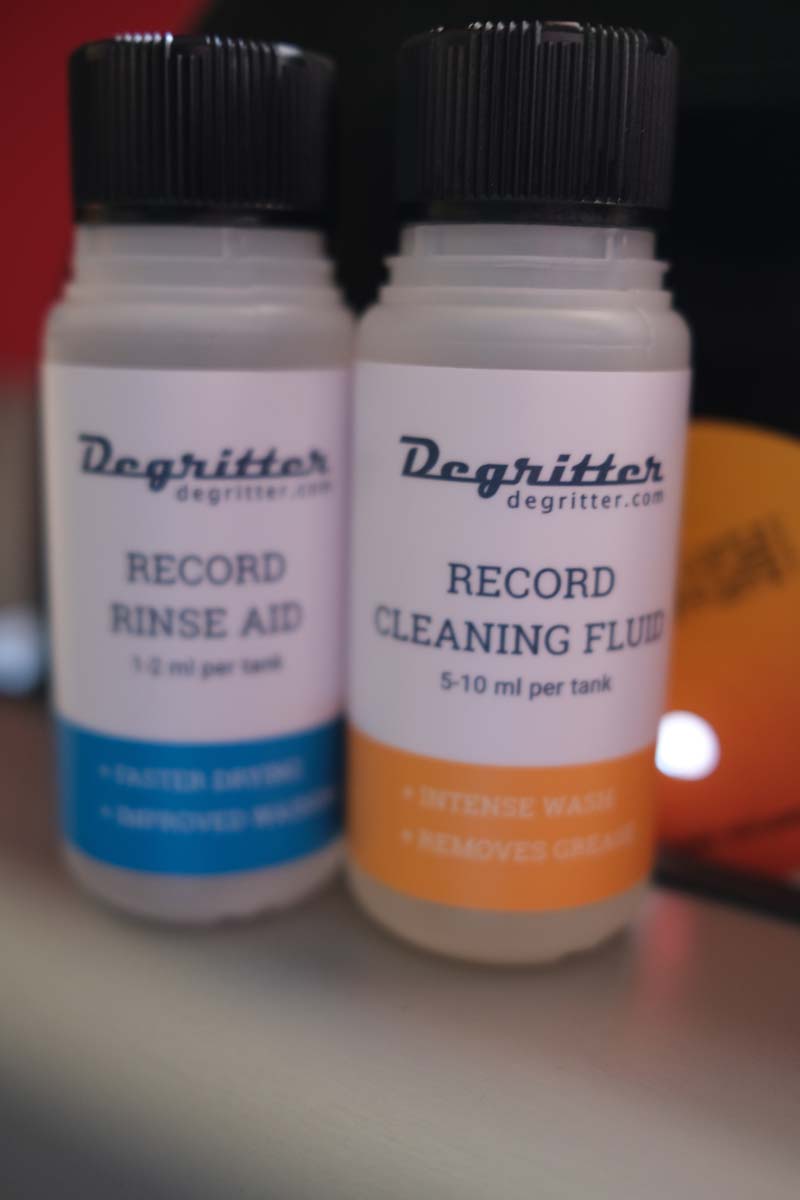
I’ve mentioned a few of the features, but let’s take a walk around the Degritter itself.
The front panel has the Degritter logo (I love it), two multifunctional buttons (nice sized knobs, actually) labeled “Drying Time” and “Program” and the cool round screen that gives you all the information you need to guide you through the settings and indicate the state of the Degritter. It looks cool and understated in my opinion with a retro-chic kind of feel to it.
Round the back you have the aforementioned voltage selector, SD card slot, AC input, power switch, and the water reservoir/tank cartridge.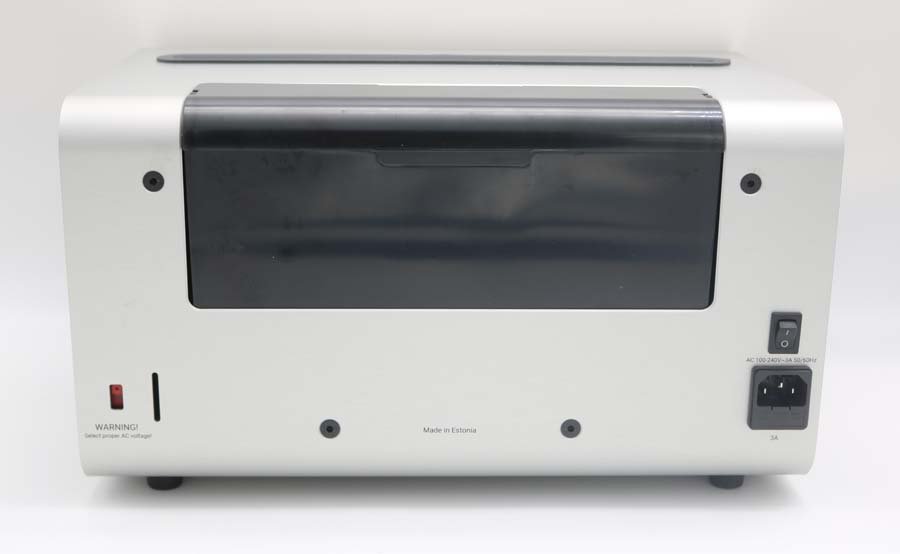
The side panels have ventilation slots and the right-hand side panel has access to the filter I mentioned previously.
I love the idea of having a removable plastic water tank as it makes life so easy and simple. Fill it up to the max point and slot it into the machine. Simple! Degritter says that the tank is ethanol proof and can be washed in a dishwasher at a maximum of 60C or 140F, though they do helpfully suggest you don’t wash it with “foodware”.
Not in the pack is an adapter for 10” and 7” records, though Degritter do make them and I’d have liked to have seen them in the deal from the offing.
IN USE
Step one is to plonk it on a level surface. Then select the correct voltage (we’ve already done this at the point we updated the firmware). Switch the machine on, obviously having plugged it in first (top tip). Put distilled water in the tank – Degritter say the water level should be “exceeding the “min” marking” and it is “recommended to fill it beyond the “max” marking. I found this last bit a tad confusing as I’d assume the “max” indicator would, errrrrrr, indicate the maximum level of water to use. Now slide your record into the slot (there’s a rubber surround to stop you scratching you vinyl on any metal bits) and press “Start” by pressing the right-hand button. Before I did this I thought it wise to ensure there was a filter in place by removing the filter holder (you’ll need a small coin), but I needn’t have bothered as Degritter had been thoughtful enough to add one prior to packaging. These filters are said to be good for 50 to 100 records before it needs to be washed. Now you’re almost ready to go!
I filled the cartridge up with distilled water (readily available), added the recommended 2ml of rinse aid using the pipette, added 5ml of record cleaning fluid, slotted in the water tank (you have to locate it into the holes which took me a second or two to suss) replace the lid of the tank and now you are really ready to get down to the business of cleaning your tunes. By the way, each fill of the tank will do around 30 records which is pretty cool.
Turn the machine on and you are presented with a welcome “drying” screen and a welcome “draining” screen accompanied by a bit of noise before you get to the menu which you can scroll through using the right-hand knob. Here you can scroll through the various cleaning menus and it’s all VERY intuitive. You have options for “Quick”, “Medium” or “Heavy” depending on the state of your vinyl, “Dry” (for drying your records without cleaning), “Degas” (for removing gas from new water – and essential task), “Fan Power” (for setting the power of the drying fan), “Water Level” (for setting the water level configuration) and “Info” (that gives you serial number, firmware version, how many cycles you have completed and the water temperature. Again, it’s all dead straightforward and intuitive, which I liked a lot. To adjust the drying time you turn the left knob from a minimum of 0 to 15 minutes and 15 seconds. These buttons can be used to stop the program or pause it too.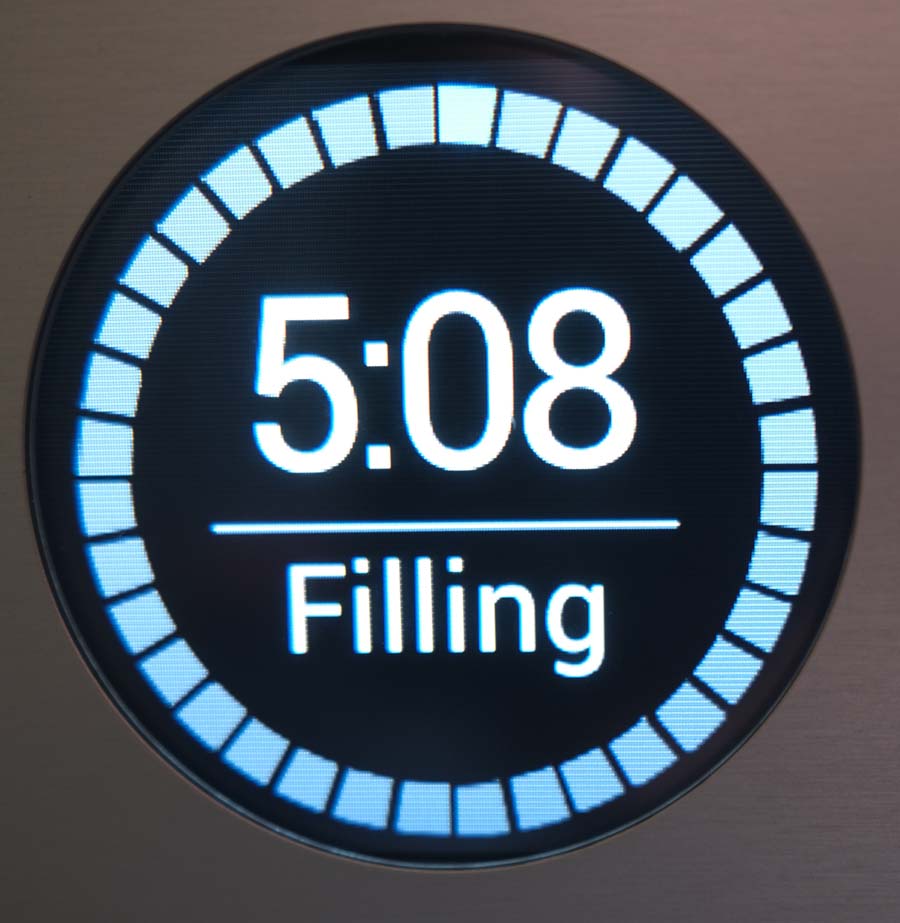
The Quick, Medium and Heavy programs are pretty obvious as mentioned and Degritter suggests using the medium program lasting 3 minutes and 45 seconds in most cases. If during the cleaning cycle the running temperature gets too hot (remember the cavitation process causes heat to be released) the cooling program will automatically initiate and you will be told this on the display – this never happened whilst I was testing the machine out and I used it pretty much without a break for each 30 or so records I did before changing the bath.
I mentioned the degassing process which has to be done on each new bath of water and this takes a couple of minutes. There is a bit of noise but it’s not too bad and you must remember to degas BEFORE adding the rinse aid and cleaning solutions – whoops! I was caught out once on this, but only once and that was more down to me not reading the manual properly and only giving it a cursory flick through. Two minute and three beeps later and you are degassed.
You alter the drying fan power by selecting it via the right-hand knob menu and selecting the level you want – on full power it is pretty noisy, on half power it’s pretty noisy and on quarter power it’s still pretty loud. Personally, I’d say that it’s as well to whack it on full power to reduce the drying time and bat through the process of cleaning your records.
Another feature touched on earlier was the Water Level and you get the little stick/strip to measure your records and determine which level you should set the machine at and this is determined by the runout groove on your record. I set this on low throughout without any issues whatsoever with any record.
The record is in the slot, the tank fills (it tells you it’s doing this) and then the cycle of washing begins (it tells you this on the screen). The record spins to and fro and around in the slot and I panicked that liquid would go on the label of the first record I cleaned – not one drop did throughout cleaning dozens upon dozens of records. The machine drains (it tells you it’s doing this) and the record dries. I realised I needed to up the drying time and so ran the process again finding that one minute of drying on medium was perfect in pretty much all cases – if not you can just dry the record without going through the whole process again.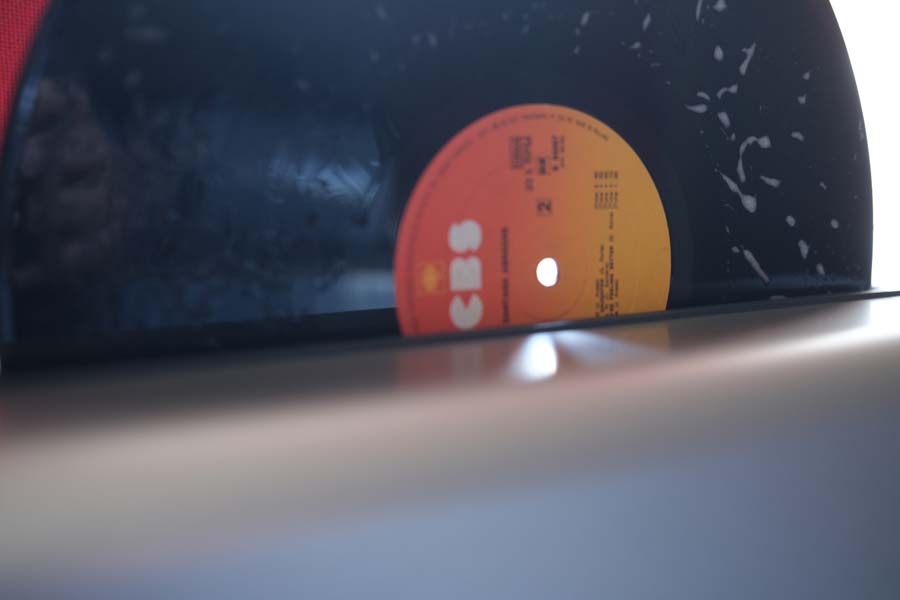
The whole process, it has to be said, is absolutely simple and intuitive, and once you have done one record you get right into the swing of it. Pop the record in, let the machine do its stuff whilst you go off to do whatever you want, come back, pop the cleaned record in a new sleeve, pop in a new record, and press start again. Not quite “Eat, Sleep, Rave, Repeat” but you get my drift. On the medium settings and on my preferred drying setting, the whole process is a little over five minutes. Genuinely, I found the whole process completely hassle-free and enjoyed the fact that I didn’t have to be hunched over the machine during the cleaning process. The real pain for me in the past when cleaning records, and a big part of why I don’t do it as often as I should with my collection is precisely this point. Not that I’m suggesting you should clean your records in the Degritter every time you use them – I’d suggest working through your collection, get them clean and then use a brush before and after until it’s clear a record does need a deep clean and then use the Degritter.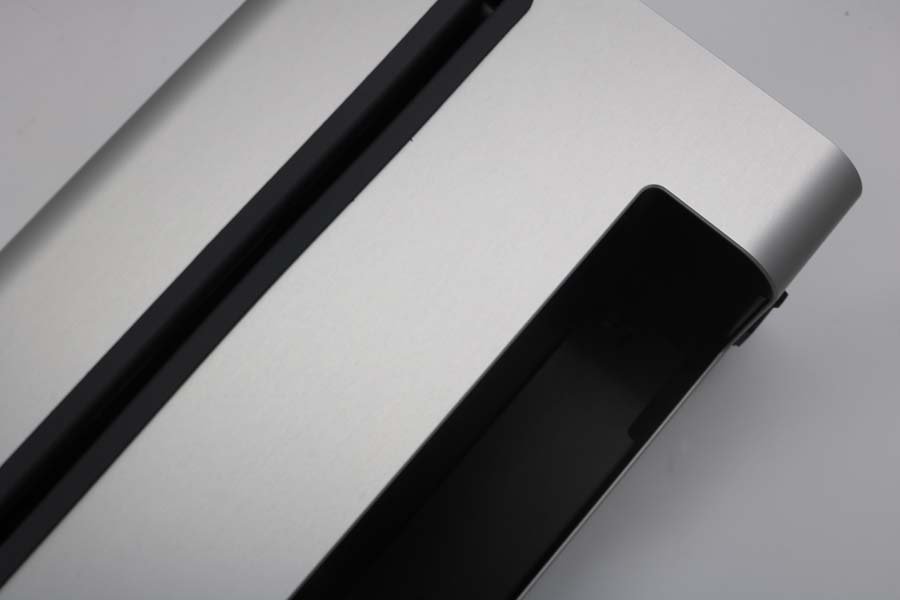
DOES IT WORK?
YEP!! The Degritter does exactly what it says it will do. I had a fairly grubby Lynyrd Skynyrd “Pronounced” record that I’ve had for donkey’s years, but is in great condition, and it came out looking like new. Playing said record I found it had lots less surface noise and all in all I was well chuffed with the outcome.
On REALLY dirty records (I buy a lot of second-hand records) I used the Heavy program and that too worked an absolute treat. The truth is that if a record has scratches and surface marks nothing in the world is going to get rid of these (they are etched into the vinyl) but the Degritter did get down into the grooves and get years of accumulated crud out of there and everything I put through it came out looking very clean and played very well.
After continuous use I did notice a small amount of frothing and a small amount of liquid being ejected from the slot – nothing major but I thought worth mentioning and likely that at this time I should have changed the water.
CONCLUSION
It’s cute, well made, easy to use and it gets your records very clean indeed. I didn’t get a microscope out and check this but I don’t think that is needed – you can clearly hear the records were clean.
The Degritter is too noisy to use whilst listening to records in the same room but less bothersome than any vacuum record cleaning machine I’ve used – think someone drying their hair in the same room as you. If you want to listen to your tunes whilst cleaning your records then pop it in another room (it’s very portable) and tend to the Degritter every cycle, though I think it looks so good as to deserve being displayed in the listening room on top of the record shelving. Is the Degritter better at cleaning a record than other machines? – I don’t know the answer to that, but personally I was thrilled with the results when compared to the machines I’ve used in the past.
Now the cost. It’s not cheap. In fact, it’s £2275 in the UK, which by anyone’s standards is a chunk of money for a record cleaning machine. But it is quick, efficient, looks good, and is pretty much hassle-free. I’d actually suggest the Degritter is a solid investment if you are looking for ease of use, stylish looks, and a product that works very well indeed. Now, I’m not suggesting the Degritter is a bargain as it’s a grand more than the Kirmuss we tested some time ago, but the Degritter is a very different machine indeed. I struggled with a suitable analogy to convey its value as it’s “just a record cleaning machine”. Yes, you could go out and buy a stock ultra-sonic bath and send to china for a record rotator doodad (though you wouldn’t have the functionality, good looks or carefully thought out frequencies etc) but that’s to miss the point of this kind of product. What you are paying for here is a product that has had considerable time and effort put into its research and development, design and functionality, and the whole come together to give us a cracking final outcome, though I would have liked to have had the 7” and 10” adapter included.
If you have a large record collection and don’t like or don’t have the time to stand over a record cleaning machine throughout the process then the Degritter could be for you. If we still owned our record shop I’d have one in a heartbeat. If you buy/sell lots of second-hand records, then again, the Degritter could well be for you.
AT A GLANCE
Build Quality: Cool looking, well thought out, and very nicely put together. I’d be happy to have this in my main listening room on display.
Ease of Use: VERY simple to use. If you have an aversion to standing over your records and getting all hands-on when cleaning them, then the Degritter may well provide a great solution.
Results: Personally I really cannot complain in any way; mildly scruffy records came out pristine (bar scratches of course) and really filthy records benefitted from the Heavy cycle to come out likewise. In short, it works!
Value For Money: Not a stone-cold bargain by any stretch and I’d liked to have seen the 7” and 10” adapter included. You are paying for a premium product that combines styling and ease of use with efficacy. If you value these things then it does offer good value.
Pros:
Easy to set up and use
Hassle-free
Great looking
Effective
Cons:
Perceived high price point
7″ and 10″ adapter not included
Price: £2275

Stuart Smith